Heaven on Earth

Heaven on Earth
Showing posts with label Techniques. Show all posts

Wednesday, October 29, 2014

Pressure Cooker Beef Stroganoff and Some For Later

We don't eat a lot of red meat but it's fall and getting colder and the leaves are turning.  AND IT'S SUNDAY DINNER.  So I made Beef Stroganoff with egg noodles.  A little bit of an indulgence.
It's comfort food for a cold day.  And it couldn't be easier to make.

I love to cook a roast in chunks in my pressure cooker.  It takes just a portion of the time to cook and I don't have to watch the roast.  If it's hot out, the pressure cooker doesn't heat up my kitchen.


 Here's the link to the original post and recipe that I posted a while back. 

This roast came in a two pack, so after dinner I prepared the second roast for a later meal.

Here's the technique:

Remove all the fat you can from the roast and cut it into large chunks (see the photo above).  Salt and pepper it and put it in the pressure cooker.  Add 10 ounces of canned beef broth, two whole cloves of garlic, 1 sliced yellow onion and one dried bay leaf.
Bring to high pressure and cook for about 60 minutes.  I used a  very lean roast so I cooked it a bit longer than you might for a roast which has more fat.

I let the pressure fall on it's own, then removed the meat and the broth into separate bowls.  Strain the broth and discard the onions, bay leaf and whole garlic cloves.  They were invited to the party to flavor the meat and broth and are tasteless now.

Put the bowls into the refrigerator. As the fat cools it will harden (it takes a few hours).  Remove the fat floating on the top of the broth and discard.  You can see there was still a fair amount even after I trimmed my meat.
Who needs extra fat when the flavor is in the meat and the broth? 
Put the meat into sturdy freezer bags or containers and pour the defatted broth over the meat. Squeeze out the air if using plastic freezer bags.
I add a bit of water if needed to just cover the meat so it won't dry out and taste of "freezer burn".  Be sure to date the container so you use the meat in a timely manner.
Pop the packages into your freezer and you have meat for a quick meal.
Defrost it and use the meat for enchiladas, any type of casserole, even French Dip sandwiches.
My favorite way to use this beef and broth is to make soup with it.  Just add vegetables and simmer.
You'll have soup on the table in fifteen minutes and it tastes like you simmered it all day. Well worth the bit of effort to prepare the meat in advance! 
If I will be using the meat in the next day or so, I pour the broth over the meat just to cover and refrigerate it.

Wednesday, October 8, 2014

A Few Things...

I've been working on a few things.
The Antler Cardigan in progress.
It's finished now and is waiting to be blocked.
The first sock from my favorite sock method/book by Wendy Johnson was halfway finished when I tried it on.  OOPS!  It was just a little too big around.  So I frogged it, wound it around my I Pad mini, 
wound it into a skein,
 made a hank out of it by tying it off in three places so it wouldn't get all tangled up and immersed it in cold water.
 Into my salad spinner it went.
 Look how much water I was able to spin out of the hank.
 
I hung it over the sink to dry.  Please ignore my sad, worn out faucet.  It's being replaced next week with a shiny bright new one.  The bath in cold water did the trick.  The kinks are gone and when the hank dries I'll wind it into a ball and re knit the yarn into another project.  I decided to frog the picot edge on the sock as well.  It was just too tight, so I did Jeny's surprisingly stretchy bind off and the second sock is now well underway.
Abby decided she wanted satin covered buttons up the back of her bridal gown so after making 15 of them, I laid them out and spaced them before hand sewing them to camouflage the invisible zipper..  Her dress is now finished.  I'll post photos of her in it later.

That's what I've been doing the last few weeks.
What's been keeping you busy?

Tuesday, February 11, 2014

Brownie Roll-Out Cookies

My daughters told me about these cookies from The Smitten Kitchen Cookbook.  I bought the cookbook but so far this recipe is all I've made (maybe more than a few times) from the book.  When I get two recommendations for the same cookie in one day I take note.  They're buttery, tender, and chocolate-y with just a hint of vanilla. Don't overcook them; they're best soft.  They're quick to make (for a cut out cookie) and I always have the ingredients in my pantry.  Nothing fancy; just the basics.  I've made ice cream sandwiches with them too. They're perfect for those because they hold together well.
They're a hit at parties and I had an cookie assignment last night so I made a batch.  Someone at the party tasted them and said,  "Oh, I make this recipe. I love these, but yours are better.  Mine are more tough".

Shall I tell you my secret?  When I make cut-out cookies, I keep a bristle pastry brush on the counter.  I brush off excess flour from the bottom and top of the raw cookies before putting them on the baking sheet.  I also brush off excess flour from the underside of the scraps before gathering them together in a ball to re-roll the dough. 
Flour makes cookies tough and the less of it you put into the dough while handling it, the softer your cookie will be.  Chilling helps and gentle handling of the dough is preferable so you don't over-develop the gluten.
A pastry or dough scraper (the white gadget above) makes clean up of our rolling board or counter fast and easy as well).  
I just needed a few dozen for the party so I wrapped a few bags for my freezer from the batch.
Six cookies in a cellophane bag tied with bakery twine were the perfect THANK YOU for a neighbor.

That's pretty good multi-tasking from one batch of cookies.  And not a bad days work, if I may say so.

Here's the recipe directly from Smitten Kitchen blog.


Brownie Roll-Out Cookies*
Recipe from Deb’s mom
3 cups (375 grams) all-purpose flour
1/2 teaspoon (3 grams) salt
1/2 teaspoon baking powder
1 cup (225 grams) lightly salted butter, softened (Deb note: I don’t really see “lightly salted” much these days, so I used one stick salted, one stick unsalted)
1 1/2 (300 grams) cups sugar
2 large eggs
1 teaspoon (5 ml) vanilla extract
2/3 cup unsweetened cocoa (approximately 60 grams — weights can vary a bit depending on brand. I use the “good” stuff–Droste, Galler or Valrhona –but I can assure you that my mother only used Hershey’s growing up, so your choice)
Preheat oven at 350 degrees. Whisk dry flour, salt and baking powder in bowl and set aside. Mix butter, sugar, eggs, vanilla and cocoa in mixer. Gradually add flour mixture, and mix until smooth. Wrap in plastic and chill for at least one hour.
Roll out cookie dough on floured counter. Cut into desired shapes, brushing extra deposits of flour off the top. (It does disappear once baked, though, so don’t overly fret if they go into the oven looking white.) Bake on a parchment-lined baking sheet for 8 to 11 minutes (the former for 1/8-inch thick cookies, the latter for 1/4-inch cookies) until the edges are firm and the centers are slightly soft and puffed.
Transfer to a wire rack to cool.
* According to my mother’s recipe, they’re called chocolate sugar cookies but I do not feel that it does them justice.

Monday, July 22, 2013

An L.A. Bridesmaid Dress

Abby was blessed to get a wonderful roommate assignment her freshman year in the dorm.  Rachel turned out to be the perfect roommate.  In fact, so perfect that the two girls roomed together for the next 3 years.

Now Rachel is moving on to another chapter in her life and Abby is traveling to LA to be a bridesmaid.
Rachel's choose orange and peach for her wedding colors.  Abby couldn't find a dress that fit Rachel's casual style and colors so I made her one.

 One seriously altered redesigned pattern, two bright 100% cotton voile fabrics,

five covered buttons, two hey-hole sleeves and a shawl collar bound with custom bias bindings, one satin sash,
a peach underskirt, six crocheted belt loops...and it's finally done

I'm happy with how it turned out and Abby loves it.  It's wearable and colorful and current (Abby's sister Rachel thinks it looks like an Anthropology dress( and most of all it's cool.  LA's hot in the summer.

Congratulations Rachel Fish!  We love you and wish we were all flying down for the wedding.


Monday, March 25, 2013

Neck roll Cover Tutorial

I love my new striped neck roll covers.  I made two different covers for my rolls, the blue striped ones to match the Delectable Mountains quilt with the hand appliqued berry border and my other blue quilts and a pair of pink covers to match the antique1850's applique quilt and the 1840's Ohio basket quilt.  There are plain white goose down pillows inside the rolls.  I like to be able to change the quilts and pillow shams now and then for variety.  I have quilts in all the bedrooms at the Stone House and I like to change them arpound and display a few of them at a time.


Here's how to make the removable round pillow covers:

Measure the round pillow you want to cover:
  • First measure the circumference of the circle (that means measure around the width of the roll, perpendicular to the stripes). My neck roll was 28" around.  Now measure the length from one long end of the pillow to the other (parallel to the stripes).  My roll measured 22" long.  I wanted my pillow to fit snugly and fill out the case so I didn't add seam allowances to those measurements.  Cut out 1 rectangle of fabric to the exact measurement of your roll (for my case, 22" x 28").  
  • Now measure the two ends of the roll. You need to find the radius of the end circles.  The diameter is found by measuring from one side of the end to the other.  Now divide the diameter by 2 to get the radius of the circle.  I must admit my geometry terminology needed a bit of a dusting off.  The radius of my roll was 4" (half of the end circle measurement). You will need to add a 11/4" to the radius measurement for the seam allowance for the casing.  You will be threading a piece of ribbon through the casing to close up the ends of the roll after inserting your inner pillow.  I cut 2 rectangles of fabric 28" (the circumference of the circle: see above) x 5 1/4" long.  
I cut two rectangles 28" x 5 1/4".  These are the ends of the cover.
I cut one rectangle 28" x 22".  This is the main body of the cover.
2 lengths of ribbon for ends; I cut 2-36" lengths of 1/2" wide ribbon.  
Optional piping: two pieces of trim each measuring the same as the width of the roll (28" each in my case). 


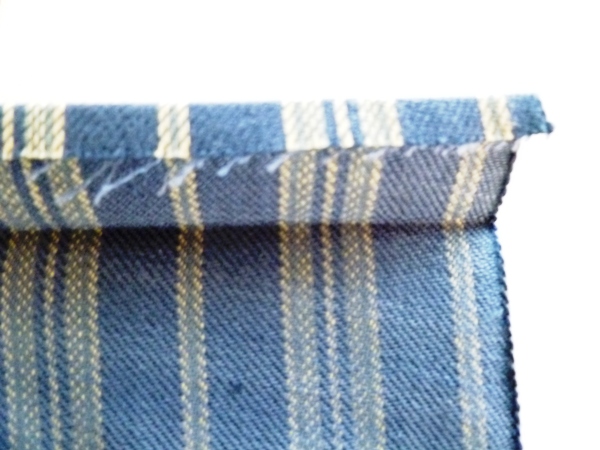
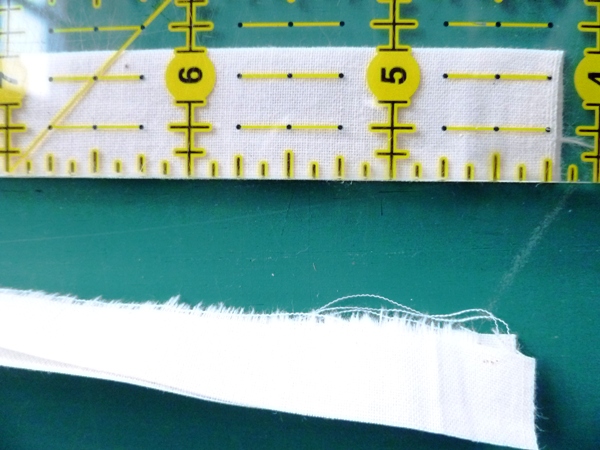
  • Along one 28" side on both end pieces, press 1/4" under to the wrong side.  Now press the 1/4" hems under another 1" on both end pieces. Each end piece will have one 28" side that is not hemmed and a side that looks like the photo above.  Do not sew the hems down at this point.  Once stitched, the hems will form the casings for the ribbon ties.NOTE:  The casing seam allowance must be twice the width of your ribbon ties plus 1/4" turn under.  If you use a ribbon that is a different width than 1/2" ribbon, you will need to adjust the casing and hem measurements .
  • If using trim or piping, place the raw edges of the piping to the  short end (28" in my case) of the main fabric piece, right side of the fabric facing up.  Pin the piping in place.  Baste the piping to the main rectangle (longest side) by sewing directly over the piping stitching. See photo above.
  • With right sides together, pin the piped end of the rectangle to the unpressed side of the end piece.  The piping will be inside the two rectangles and the hem will be toward the middle, underneath.  Place the main body piece with the piping stitching side up (see photo above), so that you can see the basting stitches of the piping.  These stitches will be your guide.  With a shortened stitch length (not basting length), adjust your machine needle and stitch just left and inside the previous basting stitches, close to the piping but be careful to not stitch into the cording.  In the photo above, you can see that the needle is slightly to the left of center of the cording foot, putting the new stitching just left of the previous basting stitches.  This will ensure that you get even width piping and that you won't see the basting stitches on the right side of the cover after turning it right side out.
  • Repeat with the other end and press the seams open.  Trim 1/2" off the ends of the cording inside the piping.   This removes the cording from the seam allowance and reduces bulk.

See my previous post for tutorial on making your own piping.

    Now you have one long rectangle with 2 rows of piping between the main body and the end pieces.
     The pressed  hems should be opened and un-stitched on each end at this stage.

    • Open out the hems and fold the rectangle right sides together lengthwise. With the casing hems opened flat, measure in 3/4" from one end and make a mark (I the middle pin for this mark).  Then measure another 1/2" toward the middle from the first mark and make another mark (far right pin).  You will not stitch between the middle and bottom pin.  Repeat for the other hem.  This 1/2" area between the marks will be left open  for ribbon casings on each end.  
    • Starting at one end, stitch 3/4" in and backstitch.  Cut your thread.  Skip the 1/2" between the marks and at the next mark, backstitch and continue sewing down the edge of long side until you reach the next mark (1 1/2" from the end of the roll).  Backstitch at the mark and cut your thread.  Skip the 1/2" area between the marks and backstitch and sew to the end of the cover.
    • Press the long seam open.
    • Turn the cover right side out. 
    • Turn the pressed hems under to the wrong side to form the casings.  You should have an opening on the right side of the fabric to thread your ribbon through.  
    Stitch the hems all the way around on each end , forming casings on both ends of the cover. 
    You can see the casing  opening in the photo below (where the scissors are inserted).  This is where the ribbons will be threaded.
    • Insert a large safety pin into one end of each ribbon and thread your ribbons in the casings.  Insert your pillow form and pull the ribbons tightly.  Tie the ribbons in a square knot and then in a bow.  
    • Trim the ends of the ribbon and apply Fraycheck to the ribbon.  *Don't trim your ribbon ends short as you will need to be able to extend them out to remove the inside pillow for laundering.
    We have quite a few more quilts in our collection so I'm on the lookout for cute fabrics to make more cases for other beds with quilts.

    Come back in a bit and I'll post a tutorial for making continental pillowcases with envelopes.  I like them because the make a nice compact case that your pillows won't slide around as much a standard cases.  They also like neat and tidy on the pillows.  And I can make them to match my other bed fabrics, which is sometimes hard to do with purchased pillowcases. Linked to Tutorials and Tips

    Wednesday, March 13, 2013

    Make Your Own Piping

    You might remember this post on neck roll pillows last week.  I made my own piping and promised a tutorial on how to do it.

    I never use packaged piping as I like to customize the color and fabric of my piping and I tend to use smaller cording than in the packages.  I used a green micro print for the neck rolls below to coordinate with the green in the circle fabric.
    It's easy to make piping and making it saves money.  I can also vary the size of the cording (thread) inside the piping depending on my project.

    Here's how I make it:


    • First purchase cording or string the diameter that you desire your piping to be (this determines the fabric width that you will cut).
    • Roughly tear or cut a strip of fabric twice the width of your seam allowance plus the diameter of your cording.  I add another 1/2" to that measurement so I can trim it after I fold it in half and press it.  I can be most accurate by doing it this way.  Press the fabric strip in half with the right side of the fabric facing out.

    (My seam allowance is 1/2" and my cording diameter is about 1/8", so the total width I need for my piping is 5/8"). But remember that the piping is folded so you need to double that finished measurement.  I needed a flat width of 1 1/4" wide.  I added another 1/2" to that measurement and I trimmed it off 1/4" from the raw edge after pressing, leaving my finished folded strip 5/8" wide.
    DO NOT TRIM FROM THE FOLDED EDGE BUT THE RAW EDGE.
    If you are a very accurate presser than I , you can just cut your strip to the final width doubled the first time.

    • Attach a cording foot or zipper foot to your machine and set the stitch length at a basting length ( I use a 3.5 stitch length on my machine for basting and I sew with a Pfaff sewing machine).While a zipper foot works fine, the cording foot is even better for making piping.  It allows the cording to ride in a groove, keeping the cording in place as you baste. Cut a piece of cording or string slightly longer than the fabric strip and insert it inside and against the folded edge of the strip.  I use a cording attachment but you can also use a zipper foot.
    • Place the cording in the groove just left of your needle or to the left of the zipper foot.
    Your stitching should be close to the cording but leave enough space between your basting stitch and the cording so that you can sew your final seam just inside the basting thread against the cording.  (I have an adjustable needle in my machine and I set the needle one setting to the left for the final seam).

    • Baste the enclosed cording inside the piping.
    • To sew the piping onto fabric, put the piping onto your pattern piece with raw edges aligned.  Stitch on top of the basting stitch on the piping using a basting stitch again.  This will anchor your piping so that you can make the final seam stitching the piping down.  Shorten your final stitch length to a sewing (not basting) length.
    • After basting the piping in place, put your second piece of fabric right sides together against the first piece and pin the piping inside the two pieces of fabric.  I turn the piece of fabric with the piping  attached to the top side, facing me.  I put the fabric without the pipin on toward the face plate of my machine.  This way I can see the basting stitch that is already holding the piping in place.  I then move my needle one setting to the left and stitch just left of the basting stitch, close to the cording. I can be sure that the basting stitch will be hidden when the fabric is turned right side out.

    Tip:  After basting the piping to your fabric (see above photo) and before stitching your final seam, pull cording equal to your seam allowance out from the end of each side of the piping strip. Cut both side pieces of cording away and discard (1/2" in my case because I used a 1/2" seam allowance). 
    Now pull the gathered up fabric strip to the right, letting the cording slide back inside the piping strip.  The cord is now 1/2" away from end of the piping and the cord is inside the piping strip.  When you sew your final seam there will be no cord in the seam allowance, thus less bulk.  Do this on both sides of your piping before sewing side seams and your seams will lay flat without the cording in the seam allowance.

    *I piped seams that were on the straight-of-grain, so I cut my fabric strips for my piping on the straight-of- grain.  If you are piping a curve, make your piping the same as directed above, but cut your fabric strips on the bias grain line.  Bias curves more than straight grain lines and lays nicely around curved pieces.

    I hope you'll come back for a tutorial on making the neck roll covers.

    Now go and make some piping.  It's a great sewing skill to master and it will make all your piped projects look custom made and professional.


    Wednesday, March 6, 2013

    Knitted Reusable Duster Covers

    I found these great re-usable Swiffer covers here.  I decided to make some.

    I love my Swiffer sweeper.   I have many, many hardwood floors to keep clean and Swiffers are a quick way to dust.  What I don't love is the price of the disposable cloths that I need to continue to buy;  they are expensive.   So I knit myself the cover that the blogger in the above link recommended (actually I knit three of them).

    Do I like them?  I DO!  A LOT!!!  They picked up a great deal of dust from my hardwood floors.  I like that I can shake them off and launder them and I really, really like that they are inexpensive to make.  Actually, they were almost free for me to make because I had a huge cone of cotton yarn sitting in the cupboard in my sewing room.  I think I bought it to make dishcloths years ago.  I have been using it as string for I don't know how long, so it was nice to have a use for some of it.

    I did my knitting in the car while my husband was driving so I made three covers.  They knit up very quickly.  Since I used 100% cotton yarn, I washed my covers in hot water before sewing them at the ends and testing if they fit the Swiffer, just in case they shrunk and I couldn't get them over my Swiffer.  They did shrink but not significantly.  In fact, I sewed my ends over 2 1/2 " instead of the 2" overhang that the pattern suggested.15" was more than sufficient width for my Swiffer, but then I have owned it since they came out with them, so maybe the newer ones are not as wide.
     I folded the right sides together and stitched the ends along the sides on 4 surfaces with a back stitch.
    Here is a cover after I turned it right side out.
       I used a neat and tight back stitch to stitch the end pockets.

    Here's what my seam using the back stitch looks like on my Swiffer cover.
    I will be making a few more of these covers so I can throw dirty ones in the laundry basket and still be able to dust daily if I need to.

    They did a good job on my floors and I am pleased that I won't have to buy the disposable covers any more.

    Monday, March 4, 2013

    The silk purses (or my new-ish neckrolls)...

    Remember those old daybed pillows?   Here they are after their "surgery".  They're in front on the bed.
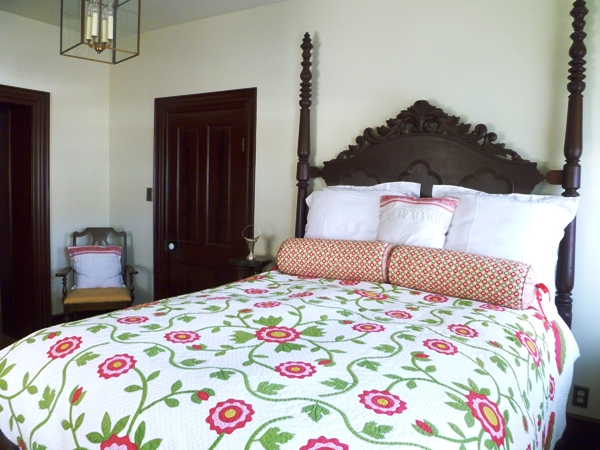
    I chose new fabrics for the pillows based on the 1850's antique album quilt on the bed.  I quite like the neck rolls now.  They are clean and the perfect size.  Best of all, there is no more lumpy stuffing. The old rolls from the day bed had removable covers but were too large for the bed.  So after removing the old shams, I unpicked the pillow and salvaged some of the batting that was used to stuff the old pillows and discarded the rest.  I unpicked the round fabric from one end and cut 2 inches in length from each pillow so that two neck rolls would fit across our antique bed (the previous owners had a carpenter widen the bed to queen size). I'll tell you the amazing bed story another time.  Then I stitched the round ends back on the tube halfway around (right sides together) and turned them right side out, leaving a hole to insert the new batting.  Next, a quick trip to the fabric store for batting on a roll, which I purchased for $8.00. I only needed 2 yards and it was on sale. Hooray!
    I put the old batting inside the new, and stuffed it into the cushions.  As you can see in the photo above left, I turned the raw edges of the circle to the inside, basted them shut and then slip stitched the cushion together, enclosing the batting.  Neck rolls can be purchased at any linen store and they are fairly inexpensive or you can make your own inside pillow using scrap fabric. My New custom pillow inserts cost me only $8.00 for the batting as I used the old fabric again.  You can't beat that for value. Making the fabric covers is easy, quick, and great value for my time.

    Another trip to the fabric store yielded some sale fabric for the removable covers.  It as my lucky day.  I made some tiny green piping with another new fabric and sewed it between the two print fabrics.
    The piping cost just a few dollars, as I had the string in my stash.  For about $20.00 I got the pillows rebuilt and refurbished, and made entirely new covers and it only took a few hours.

    I'm quite happy with the look and I like that I can remove the cases for laundering.  My husband loves his new neck roll for reading at night, and I have my eye on a woven indigo fabric for another set to match other quilts.  The Euro shams and down comforter cover are white Irish Linen, so changing out the quilts and pillows lets me switch up the bedroom color scheme with minimal effort and cost.
    I love having matching pillows with my quilts!  It was a good day's work.

    I'll be back with a tutorial for making pillow roll covers, if you're interested.   Check back for instructions.