Heaven on Earth

Heaven on Earth
Showing posts with label Sewing. Show all posts

Monday, October 27, 2014

Wedding Dresses....and more dresses.

Much of my spare time the last two months has been devoted to sewing dresses; specifically a wedding dress and a bridesmaid dress for Abby and Patrick's wedding.
Abby is my daughters freshman roommate and we've long considered her one of our own.  Patrick really is one of our own...he's an actual cousin. Now Abby is officially part of our family and we couldn't be happier.

This is Abby in her wedding dress just after the ceremony.  Doesn't they look happy? They are such a handsome couple.

Abby fell in love with the fabric and fit of a strapless wedding gown, but she wanted more coverage and she wanted sleeves.  The wedding date was set for late October and the weather turns cool by then so she chose 3/4 length sleeves.

This was the dress she purchased.

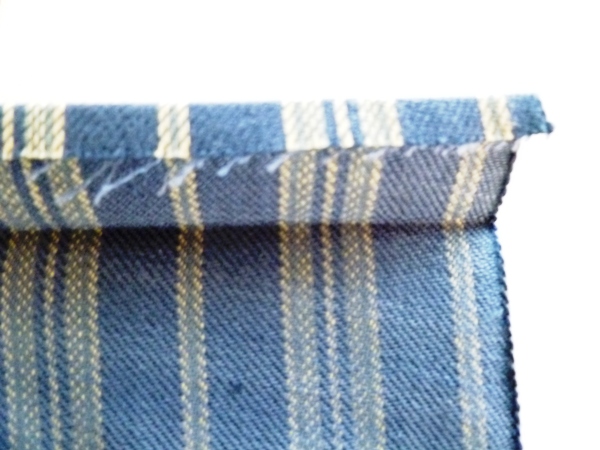
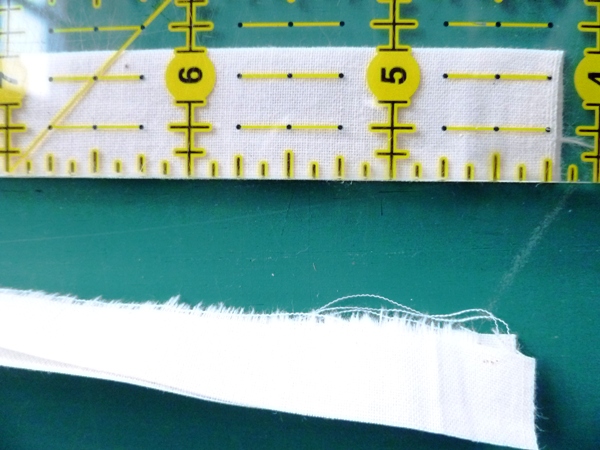
Abby's mom was able to acquire extra fabric and lace from the designer so I could build Abby a bodice with sleeves.  I took apart the entire dress; bustier, boning, lining, zipper and both fabrics (lace and underlining).  I fabricated a bodice with neckline and sleeves, took up the hem about 3 inches and put it all back together with tiny satin covered buttons up the back.

We added a satin ribbon and quite a while later,  the dress was done.
Abby was happy and I was happy. I was happy I didn't ruin Abby's wedding day with a dress she didn't like.  It's always a risk remaking an entire (already beautiful, I might add) wedding gown.  I will admit I was relieved when I finished and it was what she had envisioned.
It was a win/win situation.

My daughter Rachel arrived home from a 16 day European trip the day before the wedding. I made her a bridesmaid dress rather quickly.  She's the tall blonde to the left of the bride.

I really loved how her blue lace dress turned out.  More photos to come of Rachel's dress.

The send off was a success. 

Congratulations to the new bride and groom.

Wednesday, October 8, 2014

A Few Things...

I've been working on a few things.
The Antler Cardigan in progress.
It's finished now and is waiting to be blocked.
The first sock from my favorite sock method/book by Wendy Johnson was halfway finished when I tried it on.  OOPS!  It was just a little too big around.  So I frogged it, wound it around my I Pad mini, 
wound it into a skein,
 made a hank out of it by tying it off in three places so it wouldn't get all tangled up and immersed it in cold water.
 Into my salad spinner it went.
 Look how much water I was able to spin out of the hank.
 
I hung it over the sink to dry.  Please ignore my sad, worn out faucet.  It's being replaced next week with a shiny bright new one.  The bath in cold water did the trick.  The kinks are gone and when the hank dries I'll wind it into a ball and re knit the yarn into another project.  I decided to frog the picot edge on the sock as well.  It was just too tight, so I did Jeny's surprisingly stretchy bind off and the second sock is now well underway.
Abby decided she wanted satin covered buttons up the back of her bridal gown so after making 15 of them, I laid them out and spaced them before hand sewing them to camouflage the invisible zipper..  Her dress is now finished.  I'll post photos of her in it later.

That's what I've been doing the last few weeks.
What's been keeping you busy?

Thursday, September 11, 2014

The Wedding Dress


 There's going to be a wedding.
And this is what I've been doing this week instead of posting on my blog.

Abby bought a dress that was strapless (on sale).  She wanted one with a princess neckline and sleeves.  So a week later, I have taken the dress apart and remade it with a bodice (it will also have sleeves when I am finished with it).  The lining is altered, a new longer zipper's in place, the neckline was marked for the scalloped lace and cut out and the dress is ready to be joined to the lining.

All that's left are the sleeves and the bustle tape so Abby can dance with Patrick at her wedding.
Oh wait, on second thought...there may be some hand sewn embellishments later. And possibly a long row of tiny hand -covered buttons (just for show) up the back and some hand made loops on the sides and back so the 2-inch satin sash will stay in place. And did I mention that Abby is a teeny tiny bit of a thing, around 5 feet tall, so the hem will need to be taken up but that's a piece-of-cake after remaking the dress.

I'm in the home stretch and it feels good.  It's always a bit dangerous to undertake and make such severe changes on something so expensive and important as someone else's wedding dress, even if she a really really good friend.  Even if I think of her almost as another of my daughters.  Abby was blessed when the original dress designer gifted us some of the same fabric and lace.  Wow...he's amazingly nice. There is no way I could have found fabric or lace to match.  NO WAY.  The dress would have looked homemade and altered and not good at all without the same lace and fabric.

All this has been going on while the rest of the house looks like this....5 rooms of "like this".

I stuffed towels around the sewing room door and the dress is covered in plastic while I'm not working on it. The sewing room doesn't normally look like a bomb went off in there but there is overflow right now from other rooms that are being worked on.  I managed to clear out a good portion of it so I could work.
There's not much worse than plaster dust all over the house while trying to sew a wedding dress..
It might take a few months to wipe down the whole house.  There is dust everywhere!!!!!!!  The painters assure me they will be done by the holidays.

I'm hoping they mean the Halloween holidays. 

Tuesday, August 6, 2013

I've been busy and away from the blog.  I'm teaching a bunny class at the Wool Cabin this week.  The darling pattern can be purchased at the Little Cotton Rabbit shop on Etsy.  I'm just making up "parts" for the technique demonstrations.
And no I did not post the same photos from last week.  This is silk pencil skirt #2 and I finally got around to chopping the sleeves on the tops to elbow length.  One skirt left to make and jewelry to purchase for the Bridesmaids.  Until the end of August you will probably find me in the sewing room.  I miss all of you.


Friday, August 2, 2013

Bridesmaids Pencil Skirts

I've been away from the blog for a bit.

This is what I've been doing...

One down, two skirts partially finished.  I just need the final fitting to the girls.  I think the bridesmaids might like these, and maybe even wear the outfit again after the wedding.  Now we need to find some sort of necklace to wear.

Monday, July 22, 2013

An L.A. Bridesmaid Dress

Abby was blessed to get a wonderful roommate assignment her freshman year in the dorm.  Rachel turned out to be the perfect roommate.  In fact, so perfect that the two girls roomed together for the next 3 years.

Now Rachel is moving on to another chapter in her life and Abby is traveling to LA to be a bridesmaid.
Rachel's choose orange and peach for her wedding colors.  Abby couldn't find a dress that fit Rachel's casual style and colors so I made her one.

 One seriously altered redesigned pattern, two bright 100% cotton voile fabrics,

five covered buttons, two hey-hole sleeves and a shawl collar bound with custom bias bindings, one satin sash,
a peach underskirt, six crocheted belt loops...and it's finally done

I'm happy with how it turned out and Abby loves it.  It's wearable and colorful and current (Abby's sister Rachel thinks it looks like an Anthropology dress( and most of all it's cool.  LA's hot in the summer.

Congratulations Rachel Fish!  We love you and wish we were all flying down for the wedding.


Monday, March 25, 2013

Neck roll Cover Tutorial

I love my new striped neck roll covers.  I made two different covers for my rolls, the blue striped ones to match the Delectable Mountains quilt with the hand appliqued berry border and my other blue quilts and a pair of pink covers to match the antique1850's applique quilt and the 1840's Ohio basket quilt.  There are plain white goose down pillows inside the rolls.  I like to be able to change the quilts and pillow shams now and then for variety.  I have quilts in all the bedrooms at the Stone House and I like to change them arpound and display a few of them at a time.


Here's how to make the removable round pillow covers:

Measure the round pillow you want to cover:
  • First measure the circumference of the circle (that means measure around the width of the roll, perpendicular to the stripes). My neck roll was 28" around.  Now measure the length from one long end of the pillow to the other (parallel to the stripes).  My roll measured 22" long.  I wanted my pillow to fit snugly and fill out the case so I didn't add seam allowances to those measurements.  Cut out 1 rectangle of fabric to the exact measurement of your roll (for my case, 22" x 28").  
  • Now measure the two ends of the roll. You need to find the radius of the end circles.  The diameter is found by measuring from one side of the end to the other.  Now divide the diameter by 2 to get the radius of the circle.  I must admit my geometry terminology needed a bit of a dusting off.  The radius of my roll was 4" (half of the end circle measurement). You will need to add a 11/4" to the radius measurement for the seam allowance for the casing.  You will be threading a piece of ribbon through the casing to close up the ends of the roll after inserting your inner pillow.  I cut 2 rectangles of fabric 28" (the circumference of the circle: see above) x 5 1/4" long.  
I cut two rectangles 28" x 5 1/4".  These are the ends of the cover.
I cut one rectangle 28" x 22".  This is the main body of the cover.
2 lengths of ribbon for ends; I cut 2-36" lengths of 1/2" wide ribbon.  
Optional piping: two pieces of trim each measuring the same as the width of the roll (28" each in my case). 


  • Along one 28" side on both end pieces, press 1/4" under to the wrong side.  Now press the 1/4" hems under another 1" on both end pieces. Each end piece will have one 28" side that is not hemmed and a side that looks like the photo above.  Do not sew the hems down at this point.  Once stitched, the hems will form the casings for the ribbon ties.NOTE:  The casing seam allowance must be twice the width of your ribbon ties plus 1/4" turn under.  If you use a ribbon that is a different width than 1/2" ribbon, you will need to adjust the casing and hem measurements .
  • If using trim or piping, place the raw edges of the piping to the  short end (28" in my case) of the main fabric piece, right side of the fabric facing up.  Pin the piping in place.  Baste the piping to the main rectangle (longest side) by sewing directly over the piping stitching. See photo above.
  • With right sides together, pin the piped end of the rectangle to the unpressed side of the end piece.  The piping will be inside the two rectangles and the hem will be toward the middle, underneath.  Place the main body piece with the piping stitching side up (see photo above), so that you can see the basting stitches of the piping.  These stitches will be your guide.  With a shortened stitch length (not basting length), adjust your machine needle and stitch just left and inside the previous basting stitches, close to the piping but be careful to not stitch into the cording.  In the photo above, you can see that the needle is slightly to the left of center of the cording foot, putting the new stitching just left of the previous basting stitches.  This will ensure that you get even width piping and that you won't see the basting stitches on the right side of the cover after turning it right side out.
  • Repeat with the other end and press the seams open.  Trim 1/2" off the ends of the cording inside the piping.   This removes the cording from the seam allowance and reduces bulk.

See my previous post for tutorial on making your own piping.

    Now you have one long rectangle with 2 rows of piping between the main body and the end pieces.
     The pressed  hems should be opened and un-stitched on each end at this stage.

    • Open out the hems and fold the rectangle right sides together lengthwise. With the casing hems opened flat, measure in 3/4" from one end and make a mark (I the middle pin for this mark).  Then measure another 1/2" toward the middle from the first mark and make another mark (far right pin).  You will not stitch between the middle and bottom pin.  Repeat for the other hem.  This 1/2" area between the marks will be left open  for ribbon casings on each end.  
    • Starting at one end, stitch 3/4" in and backstitch.  Cut your thread.  Skip the 1/2" between the marks and at the next mark, backstitch and continue sewing down the edge of long side until you reach the next mark (1 1/2" from the end of the roll).  Backstitch at the mark and cut your thread.  Skip the 1/2" area between the marks and backstitch and sew to the end of the cover.
    • Press the long seam open.
    • Turn the cover right side out. 
    • Turn the pressed hems under to the wrong side to form the casings.  You should have an opening on the right side of the fabric to thread your ribbon through.  
    Stitch the hems all the way around on each end , forming casings on both ends of the cover. 
    You can see the casing  opening in the photo below (where the scissors are inserted).  This is where the ribbons will be threaded.
    • Insert a large safety pin into one end of each ribbon and thread your ribbons in the casings.  Insert your pillow form and pull the ribbons tightly.  Tie the ribbons in a square knot and then in a bow.  
    • Trim the ends of the ribbon and apply Fraycheck to the ribbon.  *Don't trim your ribbon ends short as you will need to be able to extend them out to remove the inside pillow for laundering.
    We have quite a few more quilts in our collection so I'm on the lookout for cute fabrics to make more cases for other beds with quilts.

    Come back in a bit and I'll post a tutorial for making continental pillowcases with envelopes.  I like them because the make a nice compact case that your pillows won't slide around as much a standard cases.  They also like neat and tidy on the pillows.  And I can make them to match my other bed fabrics, which is sometimes hard to do with purchased pillowcases. Linked to Tutorials and Tips

    Wednesday, March 13, 2013

    Make Your Own Piping

    You might remember this post on neck roll pillows last week.  I made my own piping and promised a tutorial on how to do it.

    I never use packaged piping as I like to customize the color and fabric of my piping and I tend to use smaller cording than in the packages.  I used a green micro print for the neck rolls below to coordinate with the green in the circle fabric.
    It's easy to make piping and making it saves money.  I can also vary the size of the cording (thread) inside the piping depending on my project.

    Here's how I make it:


    • First purchase cording or string the diameter that you desire your piping to be (this determines the fabric width that you will cut).
    • Roughly tear or cut a strip of fabric twice the width of your seam allowance plus the diameter of your cording.  I add another 1/2" to that measurement so I can trim it after I fold it in half and press it.  I can be most accurate by doing it this way.  Press the fabric strip in half with the right side of the fabric facing out.

    (My seam allowance is 1/2" and my cording diameter is about 1/8", so the total width I need for my piping is 5/8"). But remember that the piping is folded so you need to double that finished measurement.  I needed a flat width of 1 1/4" wide.  I added another 1/2" to that measurement and I trimmed it off 1/4" from the raw edge after pressing, leaving my finished folded strip 5/8" wide.
    DO NOT TRIM FROM THE FOLDED EDGE BUT THE RAW EDGE.
    If you are a very accurate presser than I , you can just cut your strip to the final width doubled the first time.

    • Attach a cording foot or zipper foot to your machine and set the stitch length at a basting length ( I use a 3.5 stitch length on my machine for basting and I sew with a Pfaff sewing machine).While a zipper foot works fine, the cording foot is even better for making piping.  It allows the cording to ride in a groove, keeping the cording in place as you baste. Cut a piece of cording or string slightly longer than the fabric strip and insert it inside and against the folded edge of the strip.  I use a cording attachment but you can also use a zipper foot.
    • Place the cording in the groove just left of your needle or to the left of the zipper foot.
    Your stitching should be close to the cording but leave enough space between your basting stitch and the cording so that you can sew your final seam just inside the basting thread against the cording.  (I have an adjustable needle in my machine and I set the needle one setting to the left for the final seam).

    • Baste the enclosed cording inside the piping.
    • To sew the piping onto fabric, put the piping onto your pattern piece with raw edges aligned.  Stitch on top of the basting stitch on the piping using a basting stitch again.  This will anchor your piping so that you can make the final seam stitching the piping down.  Shorten your final stitch length to a sewing (not basting) length.
    • After basting the piping in place, put your second piece of fabric right sides together against the first piece and pin the piping inside the two pieces of fabric.  I turn the piece of fabric with the piping  attached to the top side, facing me.  I put the fabric without the pipin on toward the face plate of my machine.  This way I can see the basting stitch that is already holding the piping in place.  I then move my needle one setting to the left and stitch just left of the basting stitch, close to the cording. I can be sure that the basting stitch will be hidden when the fabric is turned right side out.

    Tip:  After basting the piping to your fabric (see above photo) and before stitching your final seam, pull cording equal to your seam allowance out from the end of each side of the piping strip. Cut both side pieces of cording away and discard (1/2" in my case because I used a 1/2" seam allowance). 
    Now pull the gathered up fabric strip to the right, letting the cording slide back inside the piping strip.  The cord is now 1/2" away from end of the piping and the cord is inside the piping strip.  When you sew your final seam there will be no cord in the seam allowance, thus less bulk.  Do this on both sides of your piping before sewing side seams and your seams will lay flat without the cording in the seam allowance.

    *I piped seams that were on the straight-of-grain, so I cut my fabric strips for my piping on the straight-of- grain.  If you are piping a curve, make your piping the same as directed above, but cut your fabric strips on the bias grain line.  Bias curves more than straight grain lines and lays nicely around curved pieces.

    I hope you'll come back for a tutorial on making the neck roll covers.

    Now go and make some piping.  It's a great sewing skill to master and it will make all your piped projects look custom made and professional.


    Monday, March 4, 2013

    The silk purses (or my new-ish neckrolls)...

    Remember those old daybed pillows?   Here they are after their "surgery".  They're in front on the bed.
    I chose new fabrics for the pillows based on the 1850's antique album quilt on the bed.  I quite like the neck rolls now.  They are clean and the perfect size.  Best of all, there is no more lumpy stuffing. The old rolls from the day bed had removable covers but were too large for the bed.  So after removing the old shams, I unpicked the pillow and salvaged some of the batting that was used to stuff the old pillows and discarded the rest.  I unpicked the round fabric from one end and cut 2 inches in length from each pillow so that two neck rolls would fit across our antique bed (the previous owners had a carpenter widen the bed to queen size). I'll tell you the amazing bed story another time.  Then I stitched the round ends back on the tube halfway around (right sides together) and turned them right side out, leaving a hole to insert the new batting.  Next, a quick trip to the fabric store for batting on a roll, which I purchased for $8.00. I only needed 2 yards and it was on sale. Hooray!
    I put the old batting inside the new, and stuffed it into the cushions.  As you can see in the photo above left, I turned the raw edges of the circle to the inside, basted them shut and then slip stitched the cushion together, enclosing the batting.  Neck rolls can be purchased at any linen store and they are fairly inexpensive or you can make your own inside pillow using scrap fabric. My New custom pillow inserts cost me only $8.00 for the batting as I used the old fabric again.  You can't beat that for value. Making the fabric covers is easy, quick, and great value for my time.

    Another trip to the fabric store yielded some sale fabric for the removable covers.  It as my lucky day.  I made some tiny green piping with another new fabric and sewed it between the two print fabrics.
    The piping cost just a few dollars, as I had the string in my stash.  For about $20.00 I got the pillows rebuilt and refurbished, and made entirely new covers and it only took a few hours.

    I'm quite happy with the look and I like that I can remove the cases for laundering.  My husband loves his new neck roll for reading at night, and I have my eye on a woven indigo fabric for another set to match other quilts.  The Euro shams and down comforter cover are white Irish Linen, so changing out the quilts and pillows lets me switch up the bedroom color scheme with minimal effort and cost.
    I love having matching pillows with my quilts!  It was a good day's work.

    I'll be back with a tutorial for making pillow roll covers, if you're interested.   Check back for instructions.

    Friday, February 22, 2013

    Out of a Sow's Ear...

    You've heard the old saying, "Making a silk purse out of a sow's ear".

    That's what I intend.  I'm making neck rolls out of two very old rolls that used to sit on my daughter's day bed.  They were custom made by a seamstress employed by a designer years and years ago.  Let's just say they have seen better days, so when the custom bed cover that they matched was retired, I put the rolls aside.  My husband has been using them as neck rolls on our bed at the homestead and he likes them...a lot.
    But the outer covers don't match ANY of our new bed coverings and they are a bit too big, but I can recycle, so I took them apart today.  Imagine my surprise when I discovered that the seamstress had already recycled her old scraps and trimmings from other jobs by using them as stuffing.  And she charged me a WHOLE LOT of money for this mess that came from the inside.  No wonder they always felt a bit lumpy.  Good idea...bad execution.
    I salvaged what I could of the inner pillow cover and some batting.  With a little reduction surgery and a whole new outer cover, I will have rolls that fit the bed and no more lumps.  I'm off the the store for some new supplies for the "surgery" that I'm about to undertake.

    Stay tuned..